Growing beans in a jar is a fun and educational science project. It needs only a little equipment, making it great for homes and classrooms. This activity is a wonderful way to introduce kids to the world of bean germination.
Through this simple plant experiment, kids can learn by doing. They see how beans grow in different conditions. It’s a fun way to teach them about the life cycle of plants and how to care for them.
This activity does more than teach. It sparks curiosity and a love for science in kids. It’s a wonderful way to bond while exploring nature’s wonders.
Introduction to Plant Experiments
Simple plant experiments, like growing beans in a jar, are great for kids to explore nature. These science experiments teach about plant growth and encourage curiosity.
Doing kids’ activities like growing beans in a jar is both fun and educational. It teaches kids about scientific inquiry and lays the foundation for a lifelong interest in science. By watching beans grow, kids learn about plant life cycles, the role of light, water, and soil, and develop observation skills.
These experiments work for different age groups, making them useful for both educators and parents. Adults can adjust the experiment’s complexity to match the children’s needs and interests. This ensures a fun and educational experience for everyone.
By adding simple experiments like growing beans in a jar to kids’ activities, we can inspire a new generation of scientists and thinkers. It’s a simple yet effective way to make science fun and accessible for all.
Choosing the Right Beans for Your Experiment
Different bean types have unique traits that can change your experiment’s results. The bean you pick can greatly affect how well they grow and germinate. So, picking the right bean is key.
Many bean types work well for jar experiments. These include pole beans, bush beans, lima beans, and broad beans. Gardening experts say, “The right bean variety can make all the difference in your gardening success.” For example, pole beans grow tall and need support, while bush beans are smaller and don’t need it.

Lima beans and broad beans also stand out. Lima beans germinate fast and do well in jars. Broad beans, though, are hardy and can handle cooler temperatures.
When picking beans for your experiment, think about germination rates and growth habits. This helps you pick the best bean for your setup. It ensures your experiment will be a success.
“The type of bean you choose can significantly impact the outcome of your experiment,” says a renowned horticulturist. This shows how important it is to choose the right plant selection for a good experiment.
Materials You’ll Need for Your Jar Experiment
To start your bean experiment, you need a few key items. Growing beans in a jar is simple with basic materials that are easy to find.
You’ll need dried beans, a clear glass jar or a small clear plastic cup, paper towels, and a spray bottle of water. Some people also use cotton balls or napkins instead of paper towels.
The dried beans are the main focus of the experiment. It’s important to pick the right type for the best results. The clear glass jar or plastic cup lets you watch the beans grow without disturbing them. Paper towels help keep the beans moist and comfy.
The spray bottle of water helps keep the right amount of moisture in the jar. It’s important to keep it humid but not too wet, to avoid mold.
With these simple items, you’re all set to start your bean jar experiment. You’ll get to see how beans germinate and grow.
Setting Up Your Bean Jar
Setting up your bean jar is key to a successful experiment. It involves a few simple steps. Proper jar preparation is essential for your beans to grow.
First, soak your beans overnight. This step rehydrates them, making them ready to germinate. Just put the beans in water and soak for at least 8 hours.
While the beans soak, prepare the jar. Fill it with paper towels for the beans to grow in. Choose a clear jar so you can watch your beans grow.

After soaking, place the beans in the jar. Put them against the jar’s side, on the paper towels. This lets you see the roots and sprouts grow.
Then, dampen the paper towels with water. Make sure they’re moist but not too wet. This creates a humid environment perfect for growth.
As Gardening Expert said, “The right conditions are key to a successful plant experiment.” Setting up your bean jar correctly is the first step.
“The art of gardening is a process of discovery, and it’s through experiments like growing beans in a jar that we learn the most.”
By following these steps, your bean jar is set up and ready. Next, you’ll maintain the right conditions and watch your beans grow.
Caring for Your Bean Experiment
The success of your bean experiment depends on proper care and maintenance. To help your beans grow, keep the jar’s conditions just right.
Keeping the right moisture level is key. The soil should be moist but not too wet. Too much water can cause mold and stop germination. Check the soil often and water just enough to keep it balanced.
Adequate light is also important. Most beans need indirect light to grow. Place the jar near a window with plenty of natural light but avoid direct sun.
The temperature matters too. Beans grow best in temperatures between 65°F to 75°F (18°C to 24°C). Don’t put the jar near heating vents or drafty windows.
By paying attention to these care tips, you can help your beans grow well. Regular checks and tweaks will lead to the best results.
Observing Growth Progress
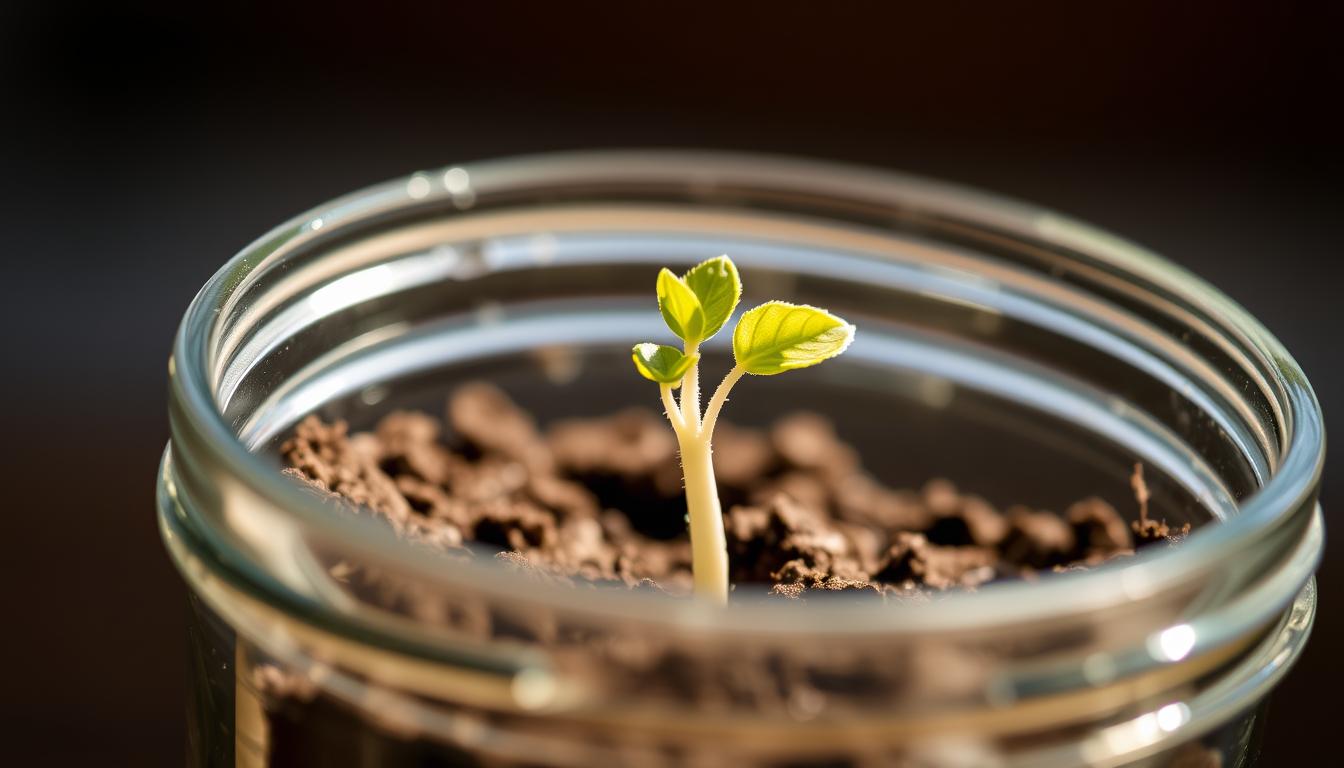
Watching the beans grow is truly magical. As you keep an eye on your bean experiment, you’ll see big changes over days and weeks. It’s not just about seeing the beans sprout. It’s about understanding the growth stages.
The first signs of germination appear in a few days. You’ll see the bean sprout, and it’s amazing how fast it grows. Growth monitoring makes the experiment even more exciting. You get to see a bean turn into a sprouting plant.

As time goes on, the sprouts will keep growing. You’ll see roots and leaves develop. Keeping a record of your observations helps you understand the process better. Note when you first see sprouts, how fast they grow, and any changes in the plant.
Key Observations
There are important things to watch during the observation period. Look at the germination rate, sprout health, and overall growth. Paying attention to these helps you understand what affects plant growth.
By regularly observing and recording your bean experiment, you learn a lot. You’ll get insights into biological processes. You’ll also improve your skills in growth monitoring and scientific observation.
Troubleshooting Common Issues
Running into problems with your bean jar experiment is normal. But knowing how to solve them is key.
One common issue is dry paper towels. If they feel dry, it means they haven’t been kept moist enough. To fix this, just moisten them with water again. But be careful not to overwater, as this can cause mold.
Inadequate Light is another problem you might face. Beans need enough light to grow. If your jar isn’t getting enough light, try moving it to a brighter spot or use grow lights.
Poor germination can be upsetting. But it often comes down to a few things. First, check if your beans are fresh and stored right. Also, make sure your jar is at the right temperature. Most beans grow best in temperatures between 65°F and 75°F (18°C and 24°C).
If you see mold or fungus, it’s probably because of too much water or humidity. To fix this, use less water and make sure there’s good air flow around your jar.
By knowing about these common problems and how to solve them, you can greatly improve your bean jar experiment’s success.
Incorporating Learning Activities
Adding different learning activities can greatly improve your bean jar experiment. One great way is to have kids measure and record the beans’ growth. This teaches them patience and introduces basic science measurement skills.
Comparative Analysis: Have learners compare beans grown in different conditions. This could be with different light or watering schedules. It leads to discussions on what affects plant growth.
Recording Observations: Keeping a journal of observations is also beneficial. Kids can note changes in the beans, like roots or shoots. This boosts their scientific literacy and thinking skills.

This saying highlights the importance of observation in science. By adding these activities to your bean jar experiment, you make it more educational and fun.
The bean jar experiment is great for all ages and learning settings. It’s a flexible tool for teaching science and promoting hands-on learning.
Experimenting with Different Conditions
Different conditions can greatly affect your beans’ growth. This makes experimenting a great way to learn. By experimenting with various factors, you can learn what affects plant growth.
Start by changing the light exposure to your bean jar. See how different light levels impact your beans’ growth and health. You can also modify the water levels to check how overwatering or underwatering affects your plants.
Consider the type of beans you’re using too. Different bean varieties may react differently to the same conditions. This gives you insights into their specific needs and traits.
By observing the outcomes of these experiments, you can learn a lot. This process not only deepens your understanding of plant biology. It also improves your scientific inquiry skills.
Remember, the key to good experimentation is to change one variable at a time. Record your observations carefully. This method helps you see how different conditions affect your bean jar experiment.
Conclusion: Reflecting on Your Plant Experiment
Looking back at your experiment is key to learning more. By growing beans in a jar, you’ve learned about science and plants up close.
Think about what you’ve learned and what you’d change next time. Remember the parts of your experiment that surprised you, like how different conditions affected the beans.
This simple experiment has taught you a lot about plants and the value of trying new things. By thinking about your experience, you can deepen your knowledge and come up with new ideas for future projects.